How do I set the PTZ camera to be on my network?

How do I connect PTZ camera to my network
WARNING: Don’t move or rotate the camera by seizing the camera head.
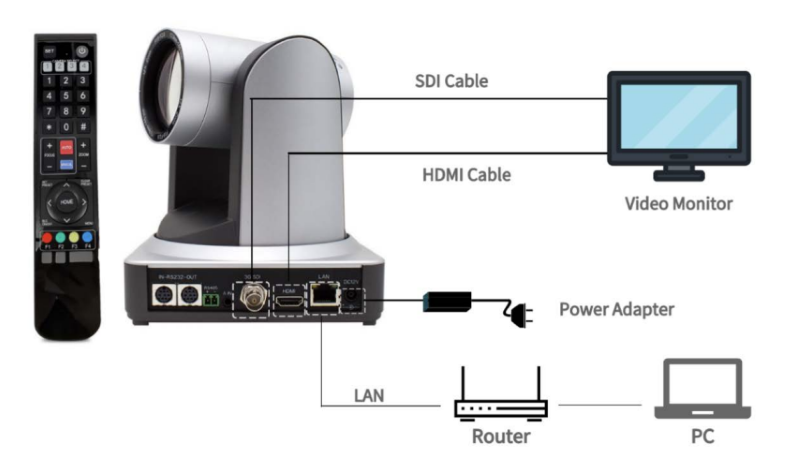
First connect the “HDMI output” as the diagram to video monitor.
Next you will need to connect the power supply.You can see the camera starts rotating to its default parking position of front middle.A LED in front will be in RED flash and turn to stead GREEN in couple of seconds. Now you can see crystal and beautiful video pictures on the monitor and control by Remoter. If you want to control camera by network, follow the steps below.

Step 1: Connect the LAN port of camera to the router or switch.
Step 2: Change PC IP setting.
1) Press “Win+R”, then type “cmd” and enter.
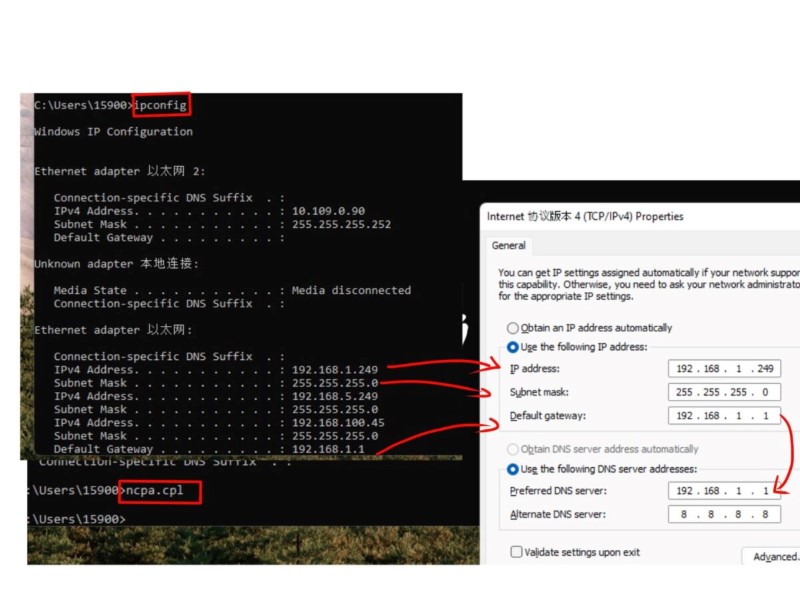
2) Type “ipconfig” in the window and enter.
3) Type “ncpa.cpl” in the same window and enter.
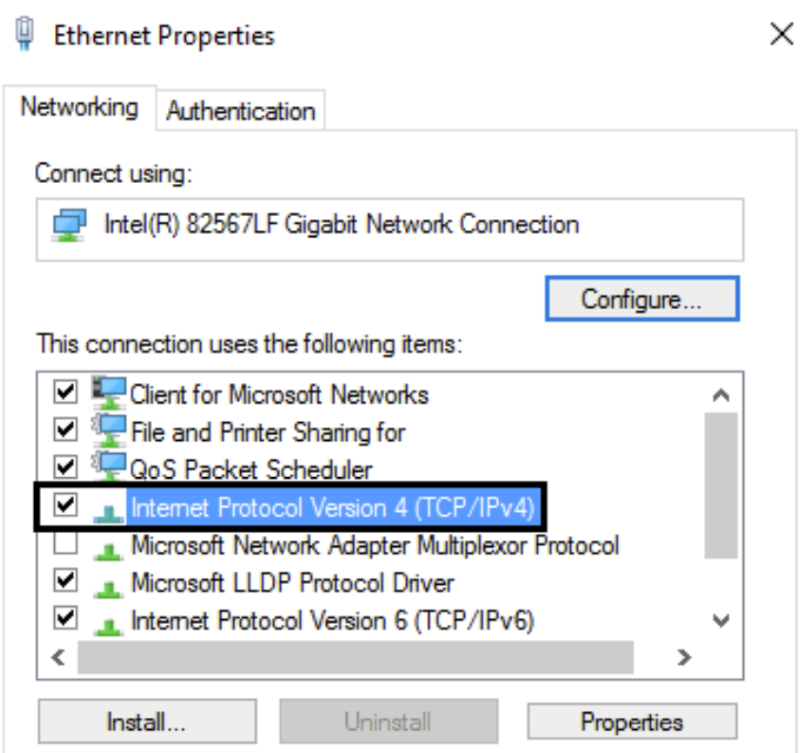
4) Right-click Local Network connection and select Properties, then double click “Internet Protocol Version 4(TCP/IPv4)”.
5) Type in IP address, subnet mask and default gateway found.
6) Use default gateway as Preferred DNS server address and “8.8.8.8” as Alternate DNS server.
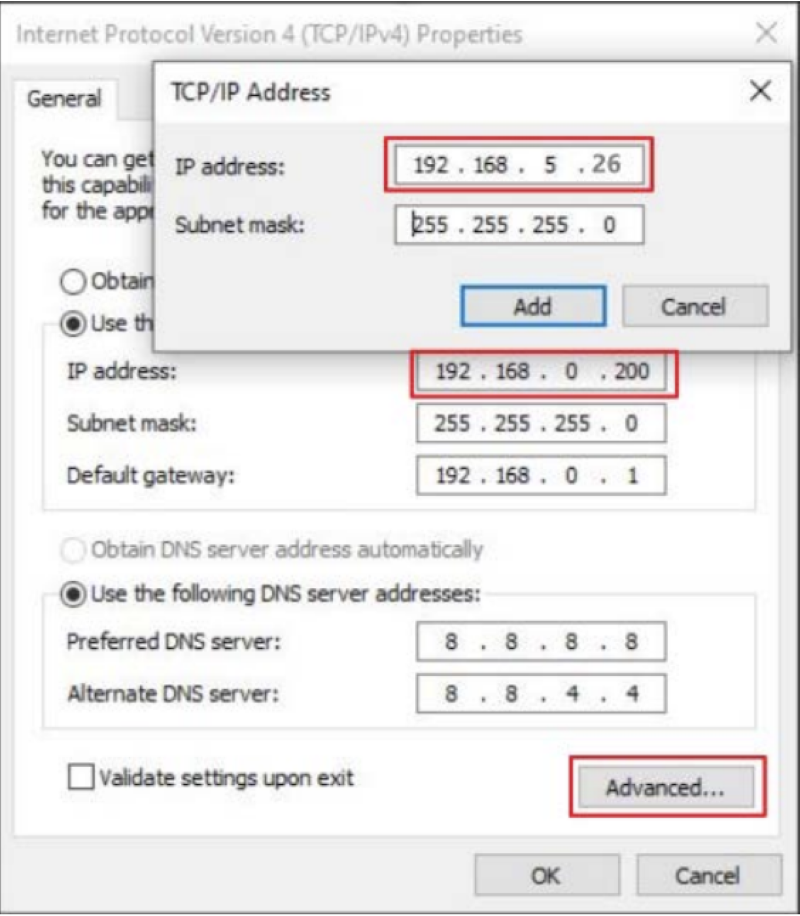
7) Click Advanced. Add a new IP address, whose first three segments are the same as camera factory default IP address (192.168.5.163). Type 192.168.5.26 for example. Subnet mask remains default.
8) Save setting.


Step 3: Now, you can access the camera, open web browser, type IP address 192.168.5.163, then enter to go to the camera login page.
Select language: English
Username: admin
Password: admin

